Getting this tart together means dealing with a messy, flour-dusted counter and a fridge full of ripe tomatoes. You’ll be rolling out cold pastry, then layering thick slices of heirlooms that ooze slightly and stain the crust. It’s hands-on, no fancy gadgets needed, just good knives and patience.
Baking it involves a careful watch—crust bubbling golden, edges crisping up just right, and tomatoes shrinking slightly, releasing their juices. You’ll want to pull it out before the crust gets too dark and let it rest a few minutes before slicing into that crackly, flaky, still-warm pastry.
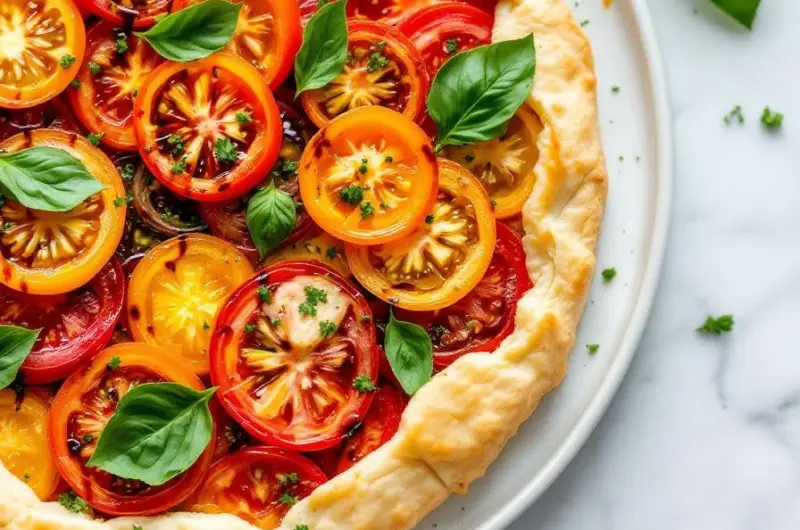
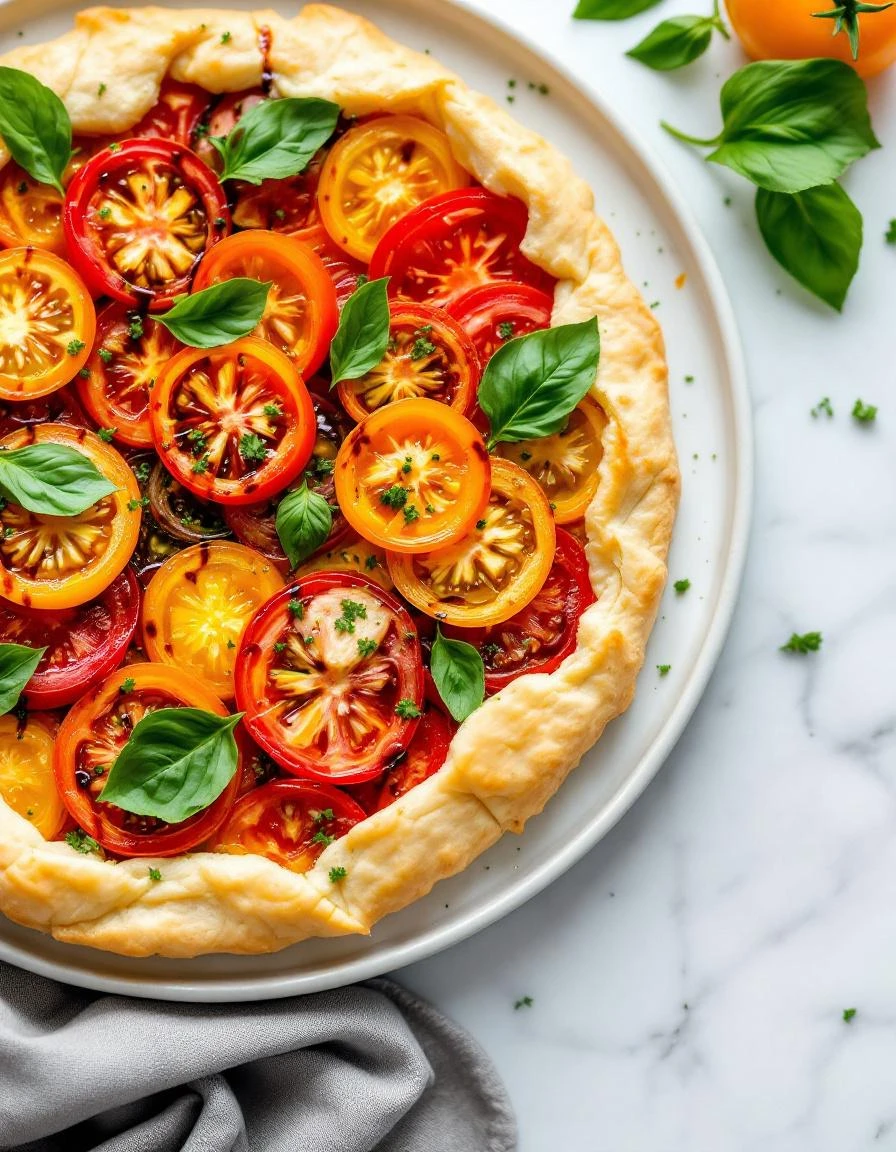
The gentle, almost imperceptible crackle of the flaky pastry as you cut through it, revealing the juicy, vibrant tomatoes inside.
What goes into this dish
- Heirloom tomatoes: I prefer thick slices, their juicy, slightly tangy flavor makes the tart pop. If you only have regular tomatoes, just add a pinch of lemon juice for brightness.
- Pie crust: A cold, butter-heavy crust is key to flaky layers. Swap for a store-bought if pressed for time, but chill it well before rolling out to keep it tender.
- Fresh basil: Adds a fragrant, peppery note that cuts through tomato richness. No basil? A sprinkle of thyme works but lacks that vibrant punch.
- Grated cheese: I use a mix of Gruyère and Parmesan for depth. Cheddar works fine, but it gives a sharper, more pungent flavor that overpowers the tomatoes.
- Olive oil: A drizzle before baking enhances the flavor and helps the crust brown. Use a good-quality, fruity oil, or skip if you’re out — but you’ll miss that aroma.
- Salt and pepper: Season generously, especially the tomatoes—they’ll release their juices and need a good sprinkle to balance acidity. Use flaky sea salt for crunch and flavor.
- Balsamic vinegar: I splash a little over the tomatoes before baking for a smoky-sweet hit. Skip if you prefer a more straightforward, fresh tomato flavor.
Heirloom Tomato Tart
Ingredients
Equipment
Method
- Preheat your oven to 375°F (190°C) and line a baking sheet with parchment paper.
- Roll out the chilled pie crust on a lightly floured surface into a 12-inch circle. Transfer it to the prepared baking sheet and chill in the fridge for about 10 minutes to relax the dough.
- While the crust chills, slice the heirloom tomatoes into thick rounds and let them sit on a paper towel to drain excess moisture—this helps prevent sogginess.
- Remove the crust from the fridge and brush the surface lightly with a bit of olive oil, especially around the edges to promote browning.
- Layer the tomato slices over the chilled crust in overlapping circles, starting from the outside and working inward, leaving about a 1-inch border.
- Sprinkle the chopped basil evenly over the tomatoes, then scatter the grated Gruyère and Parmesan cheeses on top for a savory, melty layer.
- Drizzle the tart with a bit of olive oil and sprinkle generously with salt and freshly ground pepper, enhancing the flavors.
- Place the tart in the preheated oven and bake for about 35-40 minutes, until the crust is golden brown and the cheese is bubbly and slightly browned.
- Once baked, remove the tart from the oven and let it rest for 5 minutes—this helps the juices settle and makes slicing easier.
- Optional: Drizzle a small amount of balsamic vinegar over the top for a smoky-sweet flavor contrast before slicing.
- Slice the tart into wedges, serve warm or at room temperature, and enjoy the crackly crust with juicy, flavor-packed tomato layers inside.
Common Mistakes and How to Fix Them
- FORGOT to chill the pastry dough, resulting in a tough crust. Keep it cold for flakiness.
- DUMPED the tomatoes directly on the crust, causing sogginess. Let them drain or pat dry first.
- OVER-TORCHED the edges of the tart, making the crust bitter. Cover edges with foil halfway through baking.
- MISSED salting the tomatoes enough, they become bland. Season generously for balanced flavor.
Make-Ahead and Storage Tips
- You can prep the crust and slice the tomatoes a day ahead. Keep the crust wrapped tightly in the fridge, and store sliced tomatoes in an airtight container—moisture helps keep them fresh, but don’t let them sit in their juices.
- The tart can be assembled a few hours before baking. Cover loosely with plastic wrap and refrigerate—flavors meld, and the tomatoes stay juicy without getting soggy.
- Freeze baked tart for up to a month. Wrap it well in foil and reheat in a 350°F oven until warm and crisp again, about 15-20 minutes. Expect a slight change in texture but still delicious.
- Flavor intensifies as it sits—basil and cheese develop a richer aroma. Reheat gently, checking for bubbling edges and a flaky crust that crunches under your fork.
- Reheating tips: warm the tart slowly in the oven, not the microwave—crust stays crispy, and the topping remains vibrant. Look for steam escaping and a fragrant, baked aroma.
FAQs
1. What makes heirloom tomatoes special?
Heirloom tomatoes are juicy and slightly tangy, with a complex, sweet flavor. When sliced, they feel almost oozy, releasing their rich juices as you bite into them.
2. How should I prepare the tomatoes?
Use a sharp knife to cut the tomatoes; the softer flesh can squish easily if you’re not careful. Let them drain slightly to avoid soggy crusts.
3. How do I know when it’s done?
Bake the tart until the crust is golden and crispy, and the tomatoes deepen in color and release their aroma. The cheese should be bubbly and slightly browned.
4. How should I reheat leftovers?
Reheat the tart in a low oven until warm and the crust crisps up again. You’ll notice the cheese and herbs become fragrant, and the crust crunches with each bite.
5. When is the best time to serve it?
Serve the tart at room temperature or slightly warm, when the flavors are most vibrant. The tomatoes will smell sweet and smoky, with a satisfying crunch from the crust.

Hi, I’m Isabella Cury, the creator behind Elevating Simple. Food has always been my passion, but it’s not just about creating meals—it’s about taking everyday ingredients and transforming them into something extraordinary.
My journey in the culinary world has been a blend of education, dedication, and a deep love for sharing food with others. Through this blog, I aim to inspire people to find joy in simple, flavorful cooking.


