
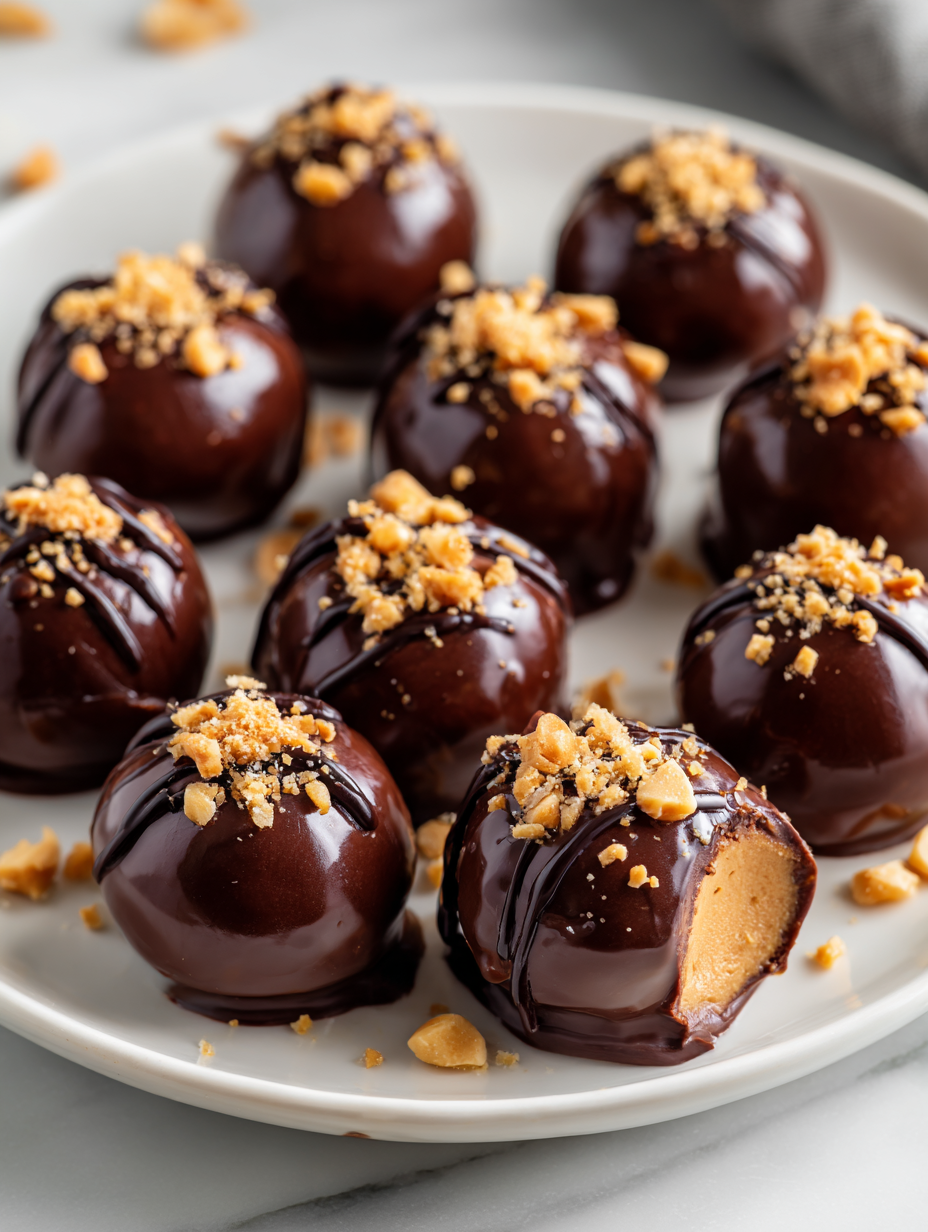
Making these chocolate peanut butter truffles is like a quiet act of rebellion—balancing that sweet, salty punch in each bite. It’s not just about the flavor but about the game of balancing those two worlds, almost like a secret handshake in the dessert world. I love how they come together so easily, yet feel fancy enough for a small celebration or a well-deserved treat after a long day.
There’s something deeply satisfying in rolling these little bites of decadence—crisp on the outside, chewy and gooey in the middle. It’s a moment of chaos turned into comfort, a simple recipe that somehow feels like a tiny victory every time. When I make them, I think about how a small handful of ingredients can turn into something that feels both nostalgic and a little bit rebellious against the usual sweetness overload.
Focusing on the unspoken art of balancing sweetness and saltiness in a small, indulgent treat that feels both nostalgic and sophisticated.
Balancing Sweetness and Salt
- Making these truffles always feels like a little act of rebellion—sweet, salty, and totally addictive.
- I love how a simple mix of peanut butter and chocolate can turn into something so indulgent, yet familiar.
- There’s a nostalgic rush when I bite into one—like a tiny, decadent hug from childhood.
- Every time I roll these, I feel a quiet pride—simple ingredients, big flavor, no fuss.
- The salty kick in the middle surprises even me, balancing the sweetness just right and keeping me coming back for more.
The story behind this recipe
- This recipe was born out of a lazy afternoon craving something sweet and salty that wouldn’t take all evening to make. I wanted a treat that felt indulgent but also manageable in a moment of chaos—something I could whip up quickly and still feel like I’d spent hours on it.
- One rainy weekend, I played around with peanut butter and dark chocolate, trying to find that perfect balance. The idea of rolling them into little balls and then dunking in melted chocolate came from a messy kitchen experiment that turned into a tiny triumph. Now, these truffles remind me that simple ingredients, when combined thoughtfully, can create moments of real joy.
- heading: ‘Inspiration from a Lazy Weekend’
Trivial & Cultural Tidbits
- These truffles draw inspiration from European confections where balancing intense chocolate flavors with salty accents is a classic move.
- Peanut butter and chocolate pairing gained popularity in the 20th century, especially after the invention of peanut butter in the US, quickly becoming a comfort food staple.
- The concept of rolling and coating confections like these dates back to traditional truffle-making in France, where simplicity meets luxury in bite-sized forms.
Key Ingredients Breakdown
- Peanut Butter: I prefer creamy, smooth peanut butter because it melts into the chocolate easily, creating a rich, oozy interior. If you want more texture, go for chunky — just expect pockets of crunch that break the bite.
- Dark Chocolate: I use 70% cocoa for a balanced bitterness that plays well with the salty peanut butter. If you prefer sweeter, swap for semi-sweet, but avoid milk chocolate unless you want it to be overly sweet and less intense.
- Butter: I add a touch of butter to the melted chocolate to give it a glossy sheen and smooth finish. For a dairy-free version, coconut oil works—just watch for a slightly different flavor profile and a softer set.
- Powdered Sugar: A small amount helps tame the bitterness of dark chocolate and adds a touch of sweetness. If you like less sweetness, cut back slightly or skip entirely, but the balance might shift.
- Salt: I sprinkle flaky sea salt on the finished truffles to enhance the flavors and add that extra salty crunch. Use regular table salt if you prefer a finer grain, but it won’t have the same burst of saltiness.
- Optional Add-ins: Chopped roasted peanuts or a drizzle of caramel can elevate these truffles. I love the crunch and contrast they add, but keep the additions small so they don’t overpower the core flavors.
Spotlight on key ingredients
Peanut Butter:
- I prefer creamy, smooth peanut butter because it melts into the chocolate easily, creating a rich, oozy interior. If you want more texture, go for chunky — just expect pockets of crunch that break the bite.
- Dark Chocolate: I use 70% cocoa for a balanced bitterness that plays well with the salty peanut butter. If you prefer sweeter, swap for semi-sweet, but avoid milk chocolate unless you want it to be overly sweet and less intense.
Dark Chocolate:
- I choose 70% cocoa for a complex, slightly bitter flavor that balances the richness of the peanut butter. When melting, it becomes glossy and smooth—watch for that perfect sheen, and avoid overheating to prevent seizing.
- Butter: I add a touch of butter to the melted chocolate to give it a glossy sheen and smooth finish. It helps the coating set beautifully and adds a silky texture. For dairy-free, coconut oil is a good substitute that still melts smoothly.
Notes for ingredient swaps
- Dairy-Free: Swap regular butter for coconut oil. Expect a slightly softer set and a hint of coconut aroma.
- Peanut Butter: Use almond or sunflower seed butter for a nutty twist. They may alter the flavor slightly and have different oil content.
- Chocolate: Choose milk or white chocolate if you prefer a sweeter, creamier coating. Keep in mind, the flavor will shift noticeably.
- Sweetener: Honey or maple syrup can substitute powdered sugar in the filling, adding extra moisture and a different sweetness profile.
- Salt: Flaky sea salt enhances flavor, but regular table salt works in a pinch—just use a finer grain to avoid over-salting.
- Add-ins: Chopped roasted nuts or dried fruit can be mixed in for texture. Adjust quantities to prevent overpowering the core flavors.
Equipment & Tools
- Small saucepan: Gently melt the chocolate without burning.
- Mixing bowl: Combine ingredients smoothly.
- Spatula: Stir and fold ingredients thoroughly.
- Cookie scoop or tablespoon: Portion out uniform truffle sizes.
- Parchment paper: Prevent sticking and easy cleanup.
- Fork or dipping tool: Dip truffles into melted chocolate neatly.
Step-by-step guide to truffle making
- Gather equipment: a small saucepan, a mixing bowl, a spatula, a cookie scoop or tablespoon, and a baking sheet lined with parchment paper.
- Melt the chocolate: chop dark chocolate into small pieces. In the saucepan over low heat (around 45°C / 113°F), melt chocolate gently, stirring constantly until smooth. Add a teaspoon of butter for shine. Remove from heat.
- Prepare peanut butter mixture: in a mixing bowl, combine creamy peanut butter with a pinch of salt and powdered sugar. Mix until smooth and slightly fluffy, about 1–2 minutes.
- Combine: fold the melted chocolate into the peanut butter mixture until fully integrated, creating a thick, glossy batter. This may seem stiff but will set as it cools.
- Chill the mixture: transfer to the refrigerator for about 30 minutes, or until firm enough to scoop and roll. It should be cool to the touch but still pliable.
- Form truffles: using a cookie scoop or tablespoon, portion out the chilled mixture. Roll each portion between your palms into a small ball, about 2.5 cm / 1 inch in diameter.
- Chill again: place the formed truffles on the prepared baking sheet. Freeze for 10 minutes to firm up for dipping.
- Melt the coating: in a clean bowl, melt the remaining chocolate over low heat or in short bursts in the microwave, stirring until smooth. Add a little butter if needed for gloss.
- Dip the truffles: using a fork or dipping tool, submerge each ball into the melted chocolate, letting excess drip off. Place back on parchment-lined sheet.
- Finish with salt: sprinkle flaky sea salt on top of each truffle before the chocolate sets fully, about 10 minutes at room temperature or 15 minutes in the fridge.
- Let set: allow the coated truffles to sit until firm, about 30 minutes at room temperature or 15 minutes in the fridge.
- Store: keep in an airtight container in the fridge for up to a week, or freeze for longer storage. Bring to room temp before serving for best texture.
Chill the dipped truffles on the parchment until fully firm, about 15–30 minutes. Serve at room temperature for optimal texture. Dust lightly with sea salt just before serving for that perfect salty crunch.
How to Know It’s Done
- Chocolate coating is glossy and firm when set.
- Truffles are fully coated without sticky spots.
- Salt flakes are visibly shiny and slightly melted into chocolate.
Chocolate Peanut Butter Truffles
Ingredients
Equipment
Method
- Chop the dark chocolate into small, even pieces and set aside.
- Gently melt the chocolate in a small saucepan over low heat, stirring constantly until smooth and glossy. Once melted, remove from heat and stir in a tablespoon of butter for extra shine.
- Meanwhile, in a mixing bowl, combine creamy peanut butter with a pinch of sea salt and powdered sugar. Mix until the mixture is smooth, slightly fluffy, and well incorporated.
- Pour the melted chocolate into the peanut butter mixture and fold gently until fully combined, creating a thick, glossy batter.
- Transfer the mixture to the refrigerator and chill for about 30 minutes until firm enough to handle.
- Using a cookie scoop or tablespoon, portion out the chilled mixture and roll each portion between your palms into small balls, about 1 inch in diameter. Place them on a parchment-lined baking sheet.
- Place the formed truffles in the freezer for 10 minutes to firm up before coating.
- Re-melt the remaining chocolate gently over low heat or in short bursts in the microwave, stirring until smooth. If needed, add a teaspoon of butter for extra gloss.
- Using a fork or dipping tool, submerge each truffle into the melted chocolate, turning to coat evenly. Let excess chocolate drip off before placing them back on the parchment-lined sheet.
- Sprinkle flaky sea salt on top of each coated truffle before the chocolate sets, about 10 minutes at room temperature or 15 minutes in the refrigerator.
- Allow the coated truffles to sit until the chocolate is fully firm and glossy, about 30 minutes at room temperature. Serve at room temperature for best texture and flavor.
Notes
Pro tips for perfect truffles
- Use room temperature ingredients for smoother melting and easier mixing.
- Chill the peanut butter mixture until firm to prevent sticky rolling and improve coating.
- When melting chocolate, do so over low heat or in short bursts to avoid seizing or burning.
- Add a tiny pinch of salt to the melted chocolate to enhance flavor contrast and depth.
- Use a fork to dip and let excess chocolate drip off, ensuring a clean, even coating.
- Sprinkle flaky sea salt immediately after coating for a burst of salty crunch as it sets.
- Rest the finished truffles at room temperature until fully firm before storing or serving.
Common mistakes and how to fix them
- FORGOT to chill the mixture before rolling? Chill for at least 30 minutes to prevent sticking.
- DUMPED the chocolate too hot? Wait until it cools slightly to avoid seizing or burning.
- OVER-TORCHED the chocolate coating? Use low heat or microwave in short bursts, stirring often.
- SKIPPED the salt topping? Add flaky sea salt just before the chocolate sets for contrast.
Quick Fixes and Pantry Swaps
- When chocolate seizes, splash in a teaspoon of vegetable oil to smooth it out.
- If mixture is too sticky, dump in a bit more powdered sugar and chill again.
- Over-torched chocolate? Patch it with a small piece of fresh chocolate and stir quickly.
- Splash a few drops of warm milk if the coating is too thick or stiff to dip smoothly.
- When in doubt, swap peanut butter for almond butter for a subtly different flavor shimmer.
Prep, store, and reheat tips
- Prepare the peanut butter mixture and chill for at least 30 minutes; it firms up, making rolling easier and less sticky.
- Truffles can be made up to 2 days in advance; store them in an airtight container in the fridge to keep the chocolate firm and shiny.
- For longer storage, freeze the uncoated or coated truffles for up to 3 weeks; let them thaw in the fridge before serving to maintain texture.
- Refrigerated truffles develop a richer chocolate sheen, but let them sit at room temperature for 10 minutes before serving to soften slightly and enhance flavor.
- Avoid reheating directly; if you need to soften, gently warm in the fridge or at room temperature to prevent melting or sweating.
Top questions about chocolate peanut butter truffles
1. Can I use chunky peanut butter?
Use creamy peanut butter for a smoother, oozy center. Chunky adds crunch but can make rolling messier.
2. How do I prevent the mixture from sticking to my hands?
Chill the mixture until firm enough to handle, about 30 minutes. If too sticky, refrigerate longer or freeze briefly.
3. Can I use different types of chocolate for the coating?
Yes, you can melt white or milk chocolate. Expect a sweeter, softer coating that might not set as firmly.
4. Should I add salt to the mixture or just on top?
Adding a pinch of sea salt on top enhances flavor contrast and adds a satisfying salty crunch.
5. How should I store these truffles?
Store the truffles in an airtight container in the fridge for up to a week or freeze for longer. Bring to room temp before serving.
6. What if the chocolate seizes or burns?
Overheating the chocolate can cause seizing. Melt over low heat or in short bursts, stirring constantly.
7. How do I get a smooth chocolate coating?
Use a dipping fork or toothpick to coat the truffles evenly without excess chocolate dripping.
8. How long should I chill the dipped truffles?
Chilling the coated truffles helps set the chocolate quickly. Let them rest in the fridge for 15–20 minutes.
9. Can I make these dairy-free?
You can replace butter with coconut oil for a dairy-free version, but expect a softer set and coconut aroma.
10. When should I add the salt?
Sprinkle flaky sea salt immediately after dipping to ensure it sticks and adds a salty crunch.
These truffles are a small, messy celebration of contrasts—rich chocolate, salty peanut butter, and that perfect snap of sea salt. They remind me that sometimes, the simplest ingredients, handled with a little care, turn into something genuinely satisfying.
Making them feels like a quiet rebellion against overly polished desserts. Whether shared with friends or kept as a secret stash, they offer a moment of honest indulgence that’s hard to beat in a busy, unpredictable day.