
There’s something about a cheese ball that just screams party. Maybe it’s the way it’s rolled in nuts or the promise of that first bite—smooth, salty, with a little crunch. It’s one of those recipes that feels like a warm hug from childhood, a simple pleasure that always seems to come out at gatherings without fail.
I grew up watching my mom bring out her cheese ball every holiday season, and I swear it was the highlight for everyone. It’s not fancy, but it’s honest—just cream cheese, shredded cheese, and whatever crunchy topping you fancy. That nostalgic tug, the way it sparks memories of family and good times, keeps me coming back to it, year after year.
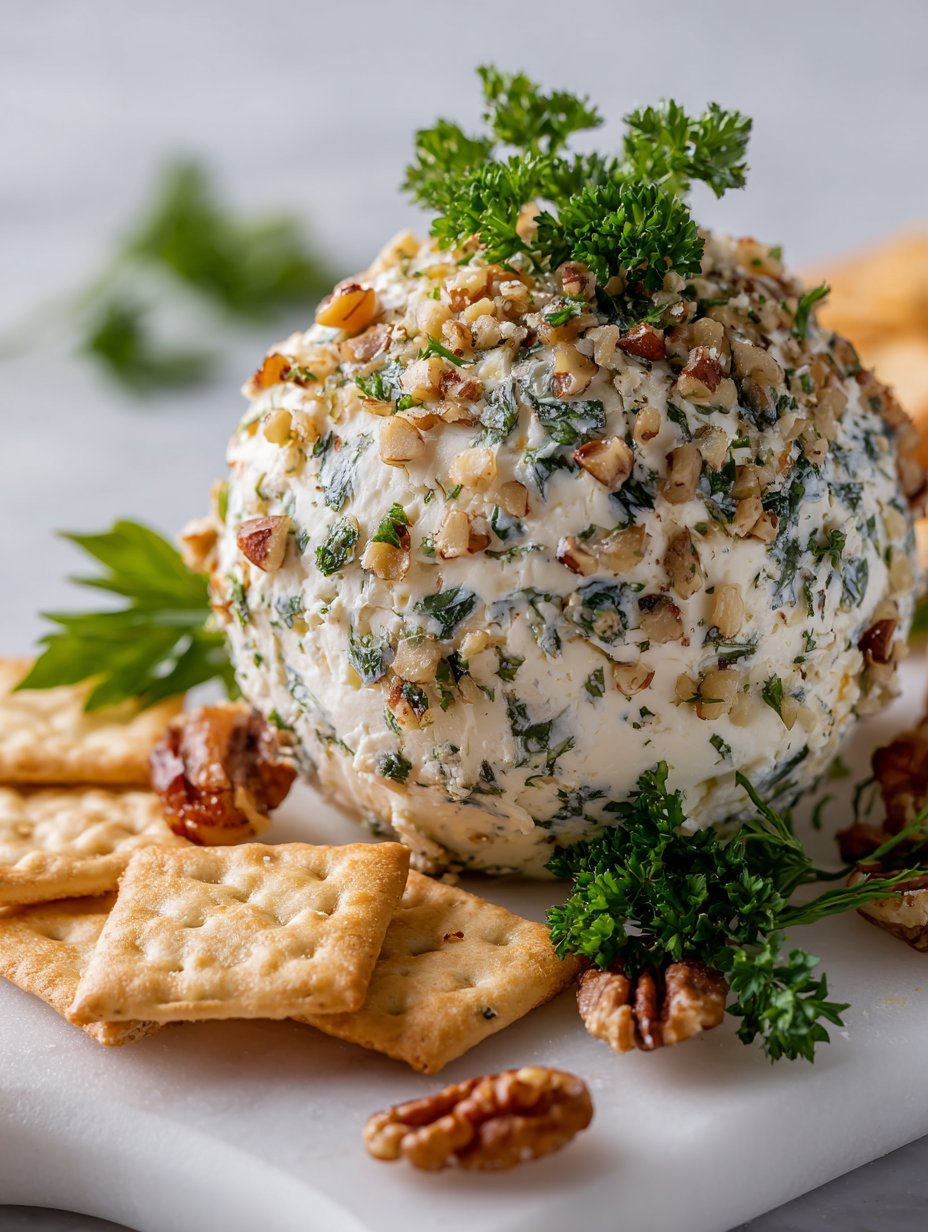
Focusing on the cheese ball as a nostalgic party staple that sparks childhood memories and brings people together over simple, cheesy goodness.
Nostalgic Party Favorite
- This cheese ball feels like a warm hug from childhood, bringing back childhood chaos and simple joys.
- I love how a cheese ball can turn any gathering into a spontaneous dance of flavors and textures.
- There’s a pride in making something so unpretentious yet universally loved, especially when it disappears fast.
- It’s a relief to know that with just a few ingredients, I can whip up something that always steals the show.
The story behind this recipe
This cheese ball recipe harks back to a time when gatherings were simpler, and the main event was a communal plate of cheesy goodness. I remember my grandmother’s kitchen—warm, bustling, filled with the aroma of melting cheese and toasted nuts—where she’d roll out these cheese balls with a practiced hand. That nostalgic memory keeps me returning to this recipe, tweaking it just enough to keep it fresh but still familiar. It’s one of those dishes that feels like a little piece of family history, handed down and loved across generations.
Cheese Ball Trivia & History
- Cheese balls gained popularity in the 1950s as a party appetizer, often served at potlucks and family gatherings.
- Originally, they were made with processed cheese and coated with nuts or herbs, making them easy to serve and share.
- Many believe the cheese ball has roots in mid-20th-century American convenience food culture, emphasizing simplicity and portability.
- The classic cheese ball became a staple at holiday dinners, especially around Christmas and New Year’s parties.
- Quirky trivia: some early recipes included chopped pickles or olives for added tang and texture.
Ingredient breakdown: key components
- Cream cheese: I love how soft and spreadable it becomes, giving the cheese ball that luscious, velvety texture. If you want a firmer ball, mix in a little more shredded cheese or chill longer.
- Shredded sharp cheddar: Adds a punch of flavor and a nice orange hue. Swap for Monterey Jack if you prefer milder, or a spicy pepper jack for a kick.
- Chopped nuts (pecans or walnuts): I prefer toasted nuts—they bring out a nutty aroma and crunch that contrasts beautifully with the creamy cheese. If nuts aren’t your thing, crushed pretzels work surprisingly well.
- Worcestershire sauce: Just a few dashes deepen the savory flavor and add an umami richness. You can substitute soy sauce for a similar salty, umami boost, but it’s less tangy.
- Garlic powder: It’s a quick way to add depth without raw garlic’s bite. For more punch, try fresh minced garlic—just be careful not to overpower the other flavors.
- Herbs (chives or parsley): Fresh herbs brighten the cheese ball. If you’re out, dried herbs can work but use half the amount to avoid overpowering.
- Optional coating (paprika, everything bagel seasoning): I like a sprinkle of paprika for color and a smoky note. For extra flavor, try everything bagel seasoning—salty, savory, with a hint of garlic and onion.
Spotlight on key ingredients
Cream cheese:
- I love how soft and spreadable it becomes, giving the cheese ball that luscious, velvety texture. If you want a firmer ball, mix in a little more shredded cheese or chill longer.
- Shredded sharp cheddar: Adds a punch of flavor and a nice orange hue. Swap for Monterey Jack if you prefer milder, or a spicy pepper jack for a kick.
Chopped nuts and Worcestershire sauce:
- Chopped nuts (pecans or walnuts): I prefer toasted nuts—they bring out a nutty aroma and crunch that contrasts beautifully with the creamy cheese. If nuts aren’t your thing, crushed pretzels work surprisingly well.
- Worcestershire sauce: Just a few dashes deepen the savory flavor and add an umami richness. You can substitute soy sauce for a similar salty, umami boost, but it’s less tangy.
Notes for ingredient swaps
- Dairy-Free: Swap cream cheese for dairy-free cream cheese or mashed avocado—less creamy but still rich and tangy.
- Vegan Cheese: Use a vegan cheese spread or nut-based cheese to keep it plant-based; flavor remains sharp if flavored well.
- Nuts: Substitute toasted sunflower seeds or pumpkin seeds if nuts allergies are a concern; they add crunch without the nutty flavor.
- Cheddar: Swap for Monterey Jack or Colby for milder, or pepper jack for a spicy kick—adjust cheese flavor accordingly.
- Herbs: Fresh herbs like chives or parsley can be replaced with dried herbs—use half as much to avoid overpowering.
- Coatings: Instead of nuts, try crushed pretzels, crispy fried onions, or even crispy bacon bits for varied crunch and flavor.
- Worcestershire: Soy sauce or fish sauce can be used as substitutes—less tang but still umami-rich, adjust seasoning to taste.
Equipment & Tools
- Large mixing bowl: To combine and mix the ingredients thoroughly.
- Spatula: For mixing ingredients smoothly and scraping down sides.
- Plastic wrap: To wrap and chill the cheese mixture for firmness.
- Plate for coatings: To hold nuts, herbs, paprika, or seasonings for rolling.
- Sharp knife: To slice and serve the cheese ball cleanly.
Step-by-step guide to cheese ball
- Gather all ingredients: cream cheese, shredded cheese, chopped nuts, Worcestershire sauce, garlic powder, herbs, and optional coatings. Have a large mixing bowl and a spatula ready.
- Soften the cream cheese: leave it out at room temperature for about 30 minutes until it’s soft and spreadable. This makes mixing easier and prevents lumps.
- Mix the base: in the bowl, combine 8 oz of cream cheese with 1 cup shredded sharp cheddar, 1 teaspoon Worcestershire, 1/2 teaspoon garlic powder, and a pinch of salt. Stir until smooth and well incorporated.
- Add flavor and texture: fold in 1/4 cup chopped toasted nuts and chopped fresh herbs (like chives or parsley). Adjust seasoning if needed. The mixture should be creamy with bits of crunch.
- Shape the cheese ball: turn the mixture onto a clean surface. Using your hands, form it into a tight ball, about 3-4 inches in diameter. If it’s too sticky, chill for 10 minutes or coat your hands with a bit of cold water or oil.
- Chill to set: wrap the cheese ball in plastic wrap and refrigerate for at least 1 hour. This helps it firm up and makes rolling in coatings easier.
- Prepare coatings: spread paprika, crushed nuts, or everything bagel seasoning on a plate. Unwrap the cheese ball and roll it in your chosen coating until fully covered. Press gently to help it adhere.
- Final chill: return the coated cheese ball to the fridge for 30 minutes to set the coating and enhance flavors.
- Serve: transfer to a serving platter, garnish with extra herbs if desired. Cut slices with a sharp knife. Enjoy the creamy, crunchy goodness.
Chill the cheese ball for at least 30 minutes after coating to set flavors and firm the shape. Serve on a platter with crackers, sliced vegetables, or bread. Keep refrigerated until ready to serve, and let sit at room temperature for 10 minutes before slicing for best texture.
How to Know It’s Done
- Color: the cheese ball should have a slight sheen and even coating.
- Texture: when pressed lightly, it should hold shape without being too soft or crumbly.
- Smell: the aroma should be cheesy, savory, with hints of herbs and nuts.
Classic Cheese Ball
Ingredients
Equipment
Method
- Place the softened cream cheese in a large mixing bowl and use a spatula to stir until smooth and creamy, breaking up any lumps.
- Add the shredded cheddar, Worcestershire sauce, garlic powder, and chopped herbs to the bowl. Mix well until all ingredients are evenly incorporated and the mixture is smooth with a slightly fluffy texture.
- Fold in the chopped toasted nuts gently, distributing them evenly throughout the mixture for added crunch and flavor.
- Turn the mixture out onto a clean surface and use your hands to shape it into a tight, round ball about 3-4 inches in diameter.
- Wrap the cheese ball tightly with plastic wrap and refrigerate for at least 1 hour to firm up and allow flavors to meld.
- Once chilled, unwrap the cheese ball and place it on a plate. Pour your choice of coatings—such as paprika, crushed nuts, or everything bagel seasoning—onto a plate.
- Gently roll the chilled cheese ball in the coatings, pressing lightly to ensure an even coat sticks all over the surface.
- Return the coated cheese ball to the refrigerator for an additional 30 minutes to set the coating and enhance flavor.
- Transfer the cheese ball to a serving platter and garnish with extra herbs if desired. Slice into wedges or serve with crackers and vegetables.
Pro tips for perfect cheese ball
- Bolded mini-head: Chill the mixture thoroughly—cold ingredients are easier to shape and help the ball hold its form.
- Bolded mini-head: Use toasted nuts for extra aroma and crunch—freshly toasted nuts bring out deeper flavor.
- Bolded mini-head: Roll in coatings immediately after chilling—warmth from your hands can make coatings slip off.
- Bolded mini-head: Incorporate herbs and nuts evenly—fold gently to distribute flavor without breaking down the mixture.
- Bolded mini-head: Adjust seasoning before shaping—taste the mixture and add salt or spice as needed for maximum flavor.
- Bolded mini-head: Chill the finished cheese ball for at least 30 minutes—this helps flavors meld and shape set.
- Bolded mini-head: Serve at room temperature—let the cheese soften slightly for the best creamy texture.
Common mistakes and how to fix them
- FORGOT to chill the cheese ball before coating? Chill for at least 30 minutes to set.
- DUMPED nuts or herbs? Ensure ingredients are evenly mixed for consistent flavor.
- OVER-TORCHED coating? Lightly toast nuts and check coating for even color.
- MISSED the sensory cues? Look for a glossy sheen, firm shape, and cheesy aroma.
Quick Fixes & Pantry Swaps
- If cheese ball cracks, gently reshape and chill for 10 minutes to restore smoothness.
- When nuts aren’t toasted enough, quick toast in a dry skillet until fragrant and golden.
- Splash a little lemon juice if cheese mixture feels too greasy or oily.
- Patch a sticky mixture by adding more shredded cheese or chilling longer before shaping.
- Shield the cheese ball from moisture by wrapping tightly in plastic wrap when storing.
Prep, store, and reheat tips
- Prepare the cheese mixture ahead: soften cream cheese and mix ingredients a day before. Keep covered in the fridge, the flavors meld and intensify overnight.
- Shape the cheese ball in advance: form into shape, wrap tightly in plastic, and chill for up to 24 hours. The surface firms up, making coating easier and cleaner.
- Store coated cheese ball: once rolled in nuts or herbs, keep it covered in the fridge for up to 2 days. The coating may absorb moisture, so add fresh toppings right before serving if needed.
- Refrigerate properly: keep chilled below 4°C (39°F). Avoid leaving out at room temperature for more than 2 hours to prevent spoilage.
- Reheating and serving: serve cold or at room temperature. If you want it softer, let it sit out 15-20 minutes; avoid microwaving as it can alter texture and cause sweating.
Top questions about cheese balls
1. How do I soften cream cheese quickly?
Use cream cheese at room temperature so it mixes smoothly without lumps.
2. Can I shape the cheese ball right after mixing?
Chill the cheese mixture for at least 30 minutes to make it easier to shape.
3. Can I make the cheese ball in advance?
Yes, you can prepare the mixture a day ahead and keep it refrigerated overnight.
4. Should I toast the nuts before adding?
Use toasted nuts for extra flavor and crunch—just toast them in a dry skillet until fragrant.
5. My coating keeps falling off. What do I do?
If the coating slides off, chill the cheese ball longer or press the coating gently to help it stick.
6. Can I use different cheeses?
Yes, you can substitute shredded cheddar with Monterey Jack or pepper jack for different flavors.
7. Can I use dried herbs instead of fresh?
Use dried herbs if fresh aren’t available, but cut the amount in half to avoid overpowering.
8. When is the best time to serve the cheese ball?
Serve the cheese ball at room temperature for a softer, creamier texture and better flavor release.
9. My cheese mixture is too greasy. How to fix it?
If the cheese mixture feels too greasy, add a little more shredded cheese or chill longer before shaping.
10. How long can I keep the cheese ball in the fridge?
Store the cheese ball wrapped tightly in plastic in the fridge for up to 2 days for best freshness.
This cheese ball isn’t just a party appetizer; it’s a slice of nostalgia wrapped in creamy, crunchy goodness. When I make it, I think of family gatherings, laughter, and the comforting aroma of toasted nuts and melting cheese.
In a world that often rushes by, this simple recipe reminds me to slow down, share something honest, and enjoy the small, cheesy moments that bring people together. It’s more than food—it’s a little tradition in every bite.